
One of the main things we LOVED about this house the second we walked in was the open concept of the kitchen and family room. The kitchen counters are a beautiful granite and we saw so much potential in the cupboards once we painted them. In our last house we were dying to paint our cabinets white but the counters were a cream laminate and white cupboards would look horrible with it. So once we saw this beautiful granite we knew we were going to paint our cabinets.
Just as a reminder, if you didn't see our house tour pictures this is what it looked like Day 1

We did a ton of research on DIY blogs and found that it shouldn't be too hard. So we went out and bought the materials and got to work.
Materials We Needed:
- White Paint (Satin Finish)
- Oil-Based Primer (Make sure it isn't water based or the paint won't stick to the cabinets)
- Foam Rollers (we tried both foam and wool and we loved the texture of the foam)
- Angle Brush to get in the small crevasses of the cabinet
- Clear Protector Coat
Step 1: Remove all of the cabinet doors and drawers (as you can see the paint job on the walls makes the kitchen look a whole lot better already)

Step 2: Prime, prime, prime! (this can get messy because of the oil base)
- We primed the cabinet doors before the base because you have to do both sides of the door (we did the back side first, let it dry while doing the bases and came back to do the front)
- Another reason why we did the back first is because if for some reason they aren't quite dry when we flip them over to do the front at least it is on the back
- You do not need to make sure that all the wood is completely covered, the priming coat just helps the paint to stick
 We used little tuperware cups to prop up the cabinet doors so it was easier to roll the sides

 Step 3: Paint and wait, then paint and wait again (we did two coats of white)
 If you look at the pictures of just the primer and the paint next to each other you can really see the wood through the primer. That is normal, you don't have to put the primer on thick.
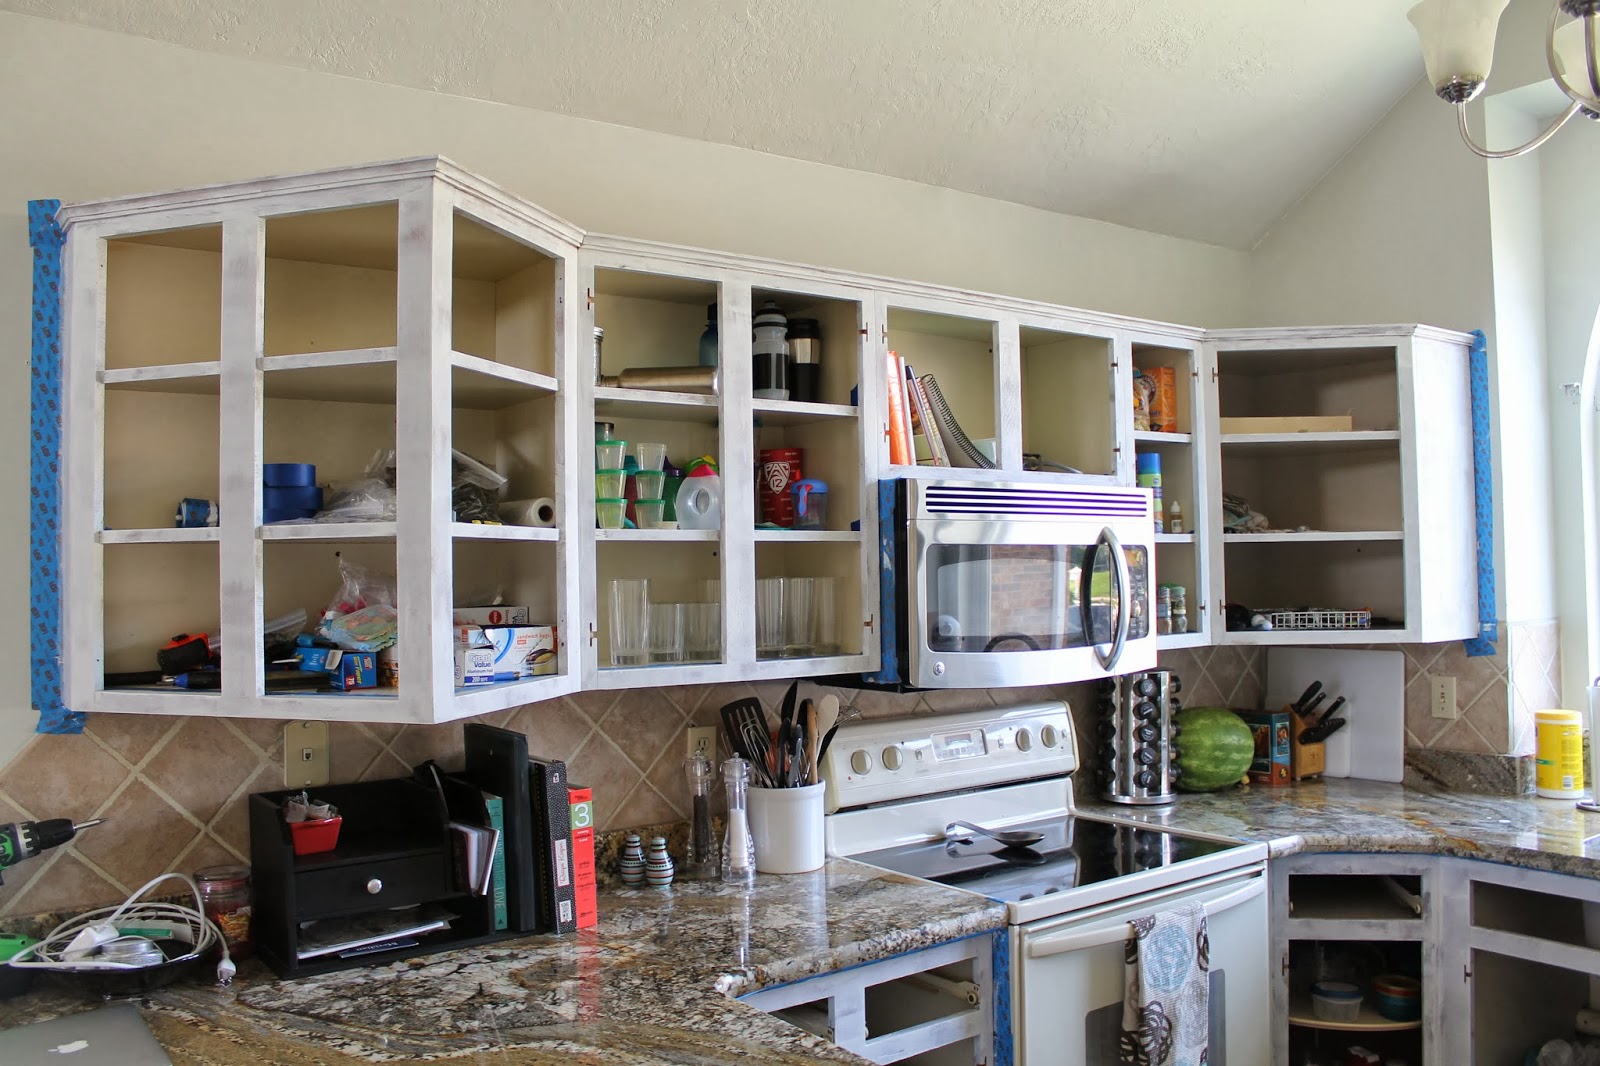
Step 4: Be patient and wait. I looked at several DIY blogs and they all advised waiting at least 3 days until you hang, but recommended 5 days. We ended up waiting a few weeks only because we were traveling and had a lot going on. So for 3 weeks this is what my kitchen looked like. Can you imagine having a 14 month old with this kitchen. Not only do we not have child locks on our kitchen cabinets, we don't have doors. She was in heaven.


Step 5: Hang the doors. We tried to save money and reuse the hinges that the cabinets had, but we decided that nasty rusted bronze hinges with white cabinets would look really bad. Plus this is the shape they were in. So we spent $120 buying all new hinges. Pricey but worth it

And Tyler was able to get this stripped screw out after a long frustrating 15 minutes.
We got really lucky with our cabinets. Each cabinet door (other than 2) had predrilled holes that made the process of putting on the doors cake. We just had to screw the hinge to the cabinet door first like this...


and VOILA...well we did have to do a bit of adjusting to make sure it was level

While Tyler was doing the doors I went around and put bumpers on all the doors and drawers.


Payton was a little hesitant at first

Put even she was a good helper

So the worst part about this whole process was that after hanging all the doors we realized after a close examination we had some minor mishaps along the way. It bothered me way too much to leave these scuffs on the door. Plus we heard it is good to put a nice clear protective coat on your cabinets to give it a glossy finish and make it easier to clean.


So the cabinets came off and I repainted the doors in need of repair and added this clear protective paint.

So for the dramatic before and after picture you need to know that we haven't finished putting the hardware on the cabinets and drawers yet but hopefully we will get around to that soon. If you look closely you can also see the upgrade in the light fixture.
BEFORE

AFTER

Another angle (P.S. the table, chairs and stools will be painted black eventually)

I'm in LOVE! These before and after posts are rocking my world. I'm so surprised you didn't have to sand your cabinets first though? I've painted so many cabinets and I also got advice to sand first.
ReplyDeleteObviously, I love your way better. Sanding is the worst. Did you find a lot of blogs and stuff that said it's ok to skip that step because of the primer?
Yea we went back and forth a lot on sanding. A lot of blogs said that it was like "extra credit". If you have the time doing it would be better, but we love the way ours turned out and we didn't sand. I absolutely HATE sanding.
DeleteI know you are traveling a lot but where are you living these days?
That's all I needed to hear to skip sanding my next project. It's like a TV stand, storage thing.
DeleteWe live in Provo! Where do you guys live?
We just moved to Layton, UT. It is north of Bountiful.
DeleteIf the texture is rough I would sand otherwise don't worry about it.
Wow! Looks great! I love seeing all the progress you guys have made!
ReplyDelete