The Radmalls

The Radmalls

Thursday, November 7, 2013

Gallery Wall

For the first 3 months of living in our house we had no decorations upstairs.  Usually when you first move into a house after unpacking the first thing you do is make it feel homey by putting up decorations.  Because we had so much to do at first (painting, ripping up tile, carpeting, and more painting) we got so tired and just gave up on the whole decoration thing.

Now that things have slowed down we can now put up some decorations to make the house feel more like a home.  The first place to start.  Above the fireplace.

You can tell from this picture that despite our best efforts of filling holes and painting, you can still see damage to the wall above the fireplace.  I debated putting up a big mirror in the middle like this by my amazing sister in law at Simple Sage Designs, but it wouldn't cover up the far left and right part of the damage.  


So we decided to do a gallery wall.


I bought a bunch of different sized frames from my favorite budget friendly decor store lately (DI) and painted them all white.  

I filled the left upper two frames with leftover fabric I had.  The bottom left was a free printable that I found online.  The right two pictures are obviously art that I did myself…haha.  I will blog later about those two FREE projects. The middle frame is the only thing I paid for.  The wooden R was a few dollars from JoAnns on sale and the fabric was $1.  So this project including the frames cost a grand total of $10.


So I read several blogs about the best way to hang a gallery wall in one try without putting a million holes in your wall. A lot of blogs like this one said to use paper to cut out the exact size of each frame and tape those to the wall first and then use nails for the real frames.  If we had a larger gallery wall we probably would have done it, but we just positioned it on the ground the way we wanted it.  Other then that all you need is a tube of toothpaste (yes toothpaste) and another set of eyes.

So you put the toothpaste on the back of the frame where the nail would go like this.


Then you place it up on the wall where you want it using someone else behind you to tell you if it looks center (or how you want it).


And the toothpaste is left behind on the wall.  


So then you simply nail where the toothpaste is and wash it off.


Works like a charm.


So we kept doing that process picture by picture and it literally took 5 minutes.


No re-nailing.  There are only 6 holes in that wall.


 Here is Tyler enjoying our cosy living room after working up a sweat hanging pictures.

Wednesday, October 23, 2013

The hardware is finally up...

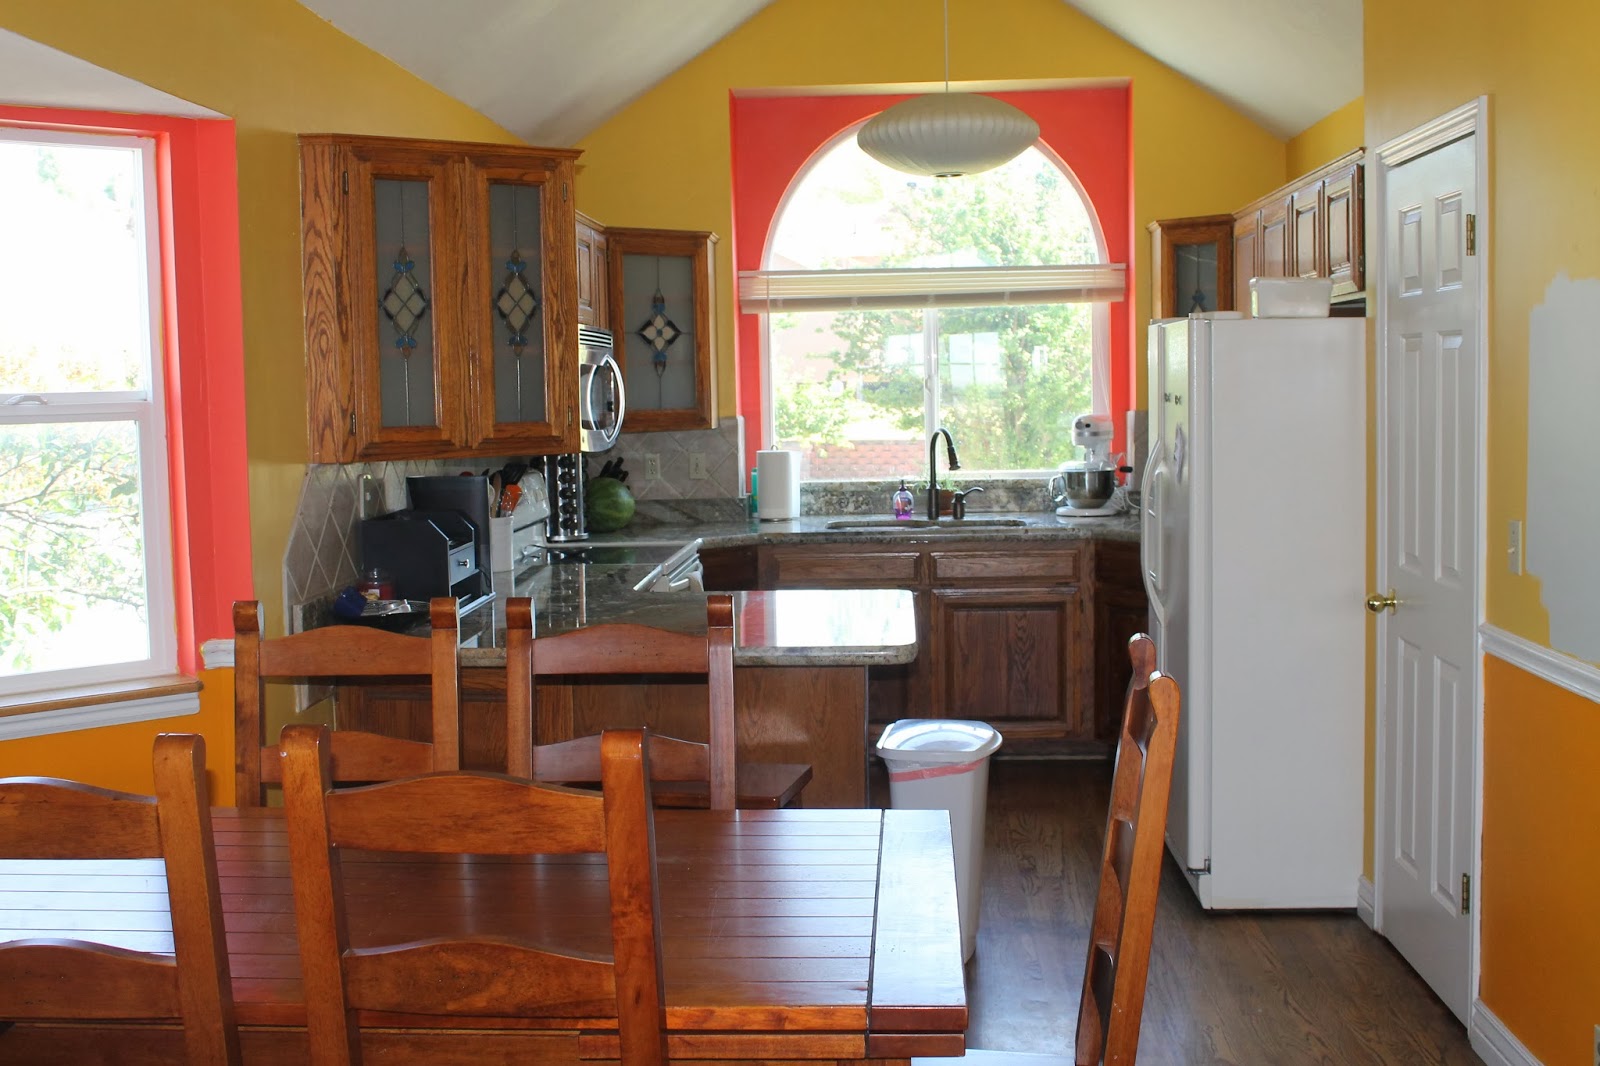
I posted a few weeks ago about how we painted our kitchen and cabinets to transform our kitchen from this..
to this...

We have never had a kitchen that had hardware on the cabinets so we decided to try it out.  Not only does it improve the look of the cabinets, but it is so nice to have on a daily basis of opening and closing cupboards and drawers.

Tyler did an amazing job of installing them with a little help from me.  

Materials needed:
-pen or pencil for marking
-power drill
-screw driver
-hardware with screws
-we purchased this measuring device which saved us the hassle of measuring and leveling


 Step 1: Place the measuring device on the bottom corner of the cabinet and use a pen to mark where to drill the holes


Step 2: Use a power drill to pre drill the holes so it makes screwing easier

(Ty's drill has a leveler in the back that he is looking at to make sure he drills straight and level)


Step 3: Place the screws in through the back of the cabinets

Step 4: Tighten the screws to the hardware

That's all it takes.

So with a little hardware (and new stools thanks to my amazing aunt) our kitchen went from looking like this...


to this..


Now the only other update is to get a new backsplash.  I'm thinking maybe something likes this or this or this.

Wednesday, October 16, 2013

DI finds!

DI has been my go to decor store.  Picture frames, coffee tables, old books, lamps and random decor.  DI has everything you need.  It just needs a little love.

Here are some of my DI finds.

$15 coffee table

$5 Small table and chair for P


Tons of $1 picture frames like this 
(unfortunately the "R" was not a DI find, but it did only cost $2 from JoAnns on sale)

All you ever need is a little paint.  I used this valspar paint + primer gloss spray paint.  For small projects it is AMAZING!


Because the coffee table was really glossy wood I primed it first before using the spray paint.  I did this a while ago, hence the nasty tile in the master bedroom.


After primed and dry, then you just need to spray...and spray...and spray.  My thumb and forearm were so sore the next day because of all the spraying.


Make sure to do the bottom first and then flip over once it is dry to do the top (I waited only 30 minutes but if you have more time I suggest waiting longer because it was a little sticky)


Before I reveal the afters I want to show a little progress of our living room.  Here is a picture of it freshly painted without any furniture.

Here is our first attempt at furniture.  


We decided the rug was too small so we exchanged it for a larger one.  We also wanted to add some more color.


Here is what our living room looks like now with a few more decorations and picture frames and my amazing DI steals!


We still plan on putting tall white bookcases on both sides of the french doors.  I really love the look of white bookcases with the back painted a fun color like this bookcase from younghouselove.com (one of my favorite blogs)


We will probably paint ours a brighter color (maybe green or a lighter blue)

Here is a close up of the coffee table


All of the books, decorations, frames and art was either free, homemade or from DI.  All of it including the coffee table was only $36.50.  I will blog on the decor and gallery wall above the fireplace in detail later.  I actually made 2 of the pictures myself.  With this close up picture you can probably guess which 2.


I am so glad our fireplace doesn't look like this anymore.


Here is Payton enjoying her new table.


Life in Layton

So we have lived here in Layton for 3 1/2 months now and we couldn't love it more.  We can say that now because the huge projects at our house have slowed down now that we moved upstairs.  If you asked us 2 months ago this would have been a downer post.  

Anyone who lives in the Salt Lake valley and has never lived north of it probably thinks that moving north of downtown Salt Lake is not an option.  I never thought that I would live anywhere but in Salt Lake valley.  I just loved the big open valley with the huge beautiful mountains and having the comfort of a big city feel.  Moving north means farm towns and no huge shopping malls or nice restaurants.  But honestly, after Tyler took me for a drive up to Layton before we started looking at houses I fell in love.  

TOP 5 THINGS I LOVE ABOUT LAYTON

1- We live right by the mountains and a beautiful reservoir (I love to hike and Tyler loves to fish)
This is literally a 10 minute walk from our backyard.

2- From our deck we have a beautiful view of the great salt lake and the beautiful mountains.


3- There is not even half the amount of traffic because it is a smaller town, but still has everything we could possibly need less than 10 minutes away (Lowes - lately we feel like we live there, even H&M, Gap and the Apple store in this amazing new outdoor shopping mall called Station Park in Farmington)


4- We are closer to downtown Salt Lake living in Layton than we were living in West Jordan (20 minute freeway drive vs. 30 minute commute on surface streets and freeway)

5- The people are amazing here!

My beautiful cousin got married this past weekend up at Sundance.  Her wedding was amazing and she looked gorgeous.  Weddings with a baby are a totally different experience than weddings without.  Despite the craziness of making sure she didn't pull the tablecloths off the tables and get into everyones purses, we had a blast!


She even broke in the dance floor for the bride and groom.


I wish I had a video to capture this priceless moment.