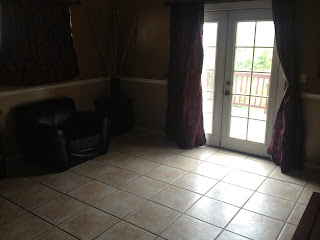
I mentioned before that we LOVE the potential of our master bedroom. However there is a lot of work to do on it. If you recall this is what it looked like before we moved in.
Looking in from the bedroom door
Looking from the french doors
Things we LOVE:
1- the fact that we have deck access from our room (with an awesome view)
2- we have a fireplace that you can enjoy from the bedroom and bathroom
3- cathedral ceilings (you can't see from these pictures)
Things we want to CHANGE:
1- tile to carpet (we want a cosy room with carpet, nothing is worse then waking up in the winter and having to touch cold tile to get out of bed)
2- the paint color OBVIOUSLY
3- a door separating the bedroom and bathroom
4- totally redo the master bathroom (but that is way down the line)
So we actually didn't sleep in our master bedroom until 3 months of living in the house (last weekend) because there was so much to do with it. Now that our room and Payton's room are done we are so excited to be out of the basement. More on Payton's room transformation later.
So the first step was to get rid of the tile. Tyler got some of his friends over and they had the tile gone within 1 hour. Easy peasy.
Here are the only tools he used. He actually ended up not using the two items on the left. Just pound with the hammer and pry the tile off with the crow bar.
Payton wanted to get her hands dirty. Yes I know she looks like a boy. I thought it was fitting.
I also thought it was fitting that she had a hard hat.
Here are some pictures of Ty hard at work.
So here is what the room looked like before Ty got his hammer out...
...and here is after
Unfortunately we discovered some rotted wood over by the french door, which probably relates directly to the old deck falling away from the house.
Monti was a little worried...
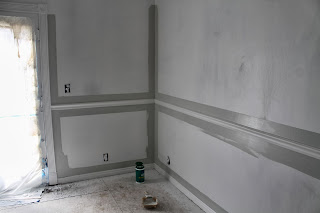
Fortunately it was a pretty easy fix. It just took us a while to do it. It wasn't until the carpet installer called and said he had an opening to come early and we jumped on it. So even though I haven't posted about the paint job on this room, I will add it in really quickly now. We decided to roll this room and it was SOOO much easier. I bought one of those edger rollers to do all the trim like this and I LOVED it. One tip though (use a paint brush to apply the paint to the foam pad). I did all of the trim and Tyler came in with the roller.
Before and after pics for dramatic effect...
So now back to the rotting plywood. We had to buy some plywood and 2x4's and liquid nails. Tyler's dad was up to help us with this project while his crew was outside working on our yard.
Step 1: Remove the rotted wood with a circular wood saw
Step 2: Reinforce the edges of the hole with 2x4's (they just nailed them into the base already there)
Step 3: Cut the plywood to the EXACT dimensions of the old rotted plywood. The hardest part was cutting the rectangle for the HVAC vent.
Step 4: Glue the plywood down with liquid nails and reinforce with nails to the 2x4's.
Tyler's dad was amazing that weekend. He helped us get so much down on our house not to mention our yard makeover. Thanks GARY we love you!
I have to throw in a picture of my favorite part of this room... THE VIEW
Sneak peek of Payton's room...
....more on that later


The room looks so much bigger with that new paint! Your view is amazing! I'm so excited for you!
ReplyDeleteThanks Linsie! We are finally enjoying our house now! Your kids are getting so big now!!
ReplyDelete